Recent posts concerning this free browsing tweak are as follows:
New Etisalat Free Browsing Working IP And Settings For Social Me Plan
Etisalat Free Browsing With N0.00k And On Social Pack Plans
You can now be able to browse on your Etisalat line, Android phone with those on any of the social pack plans for free and unlimited.
All you will do is to follow the simple process that will be shown below:
1. Remember also that you will need to have the HTTP Injector Android Application.
Also make sure you are subscribed to any of the Etisalat Social Pack plans.
See:
How To Subscribe To Any Of Etisalat Social Pack Plans.
First: You must be on Easycliq; If you are not on Easycliq, Simply Dial *244*1# to migrate to EasyCliq.
Second: Subscribe for the Etisalat socialme plan, by dialing *343*6*10# for the weekly plan @N300 and *343*6*11# for the Monthly plan @N500.
Second: Subscribe for the Etisalat socialme plan, by dialing *343*6*10# for the weekly plan @N300 and *343*6*11# for the Monthly plan @N500.
2. Where to download the HTTP Injector Application, Goto Google Play Store and search for "HTTP Injector", see a photo shot of the whole download process below:
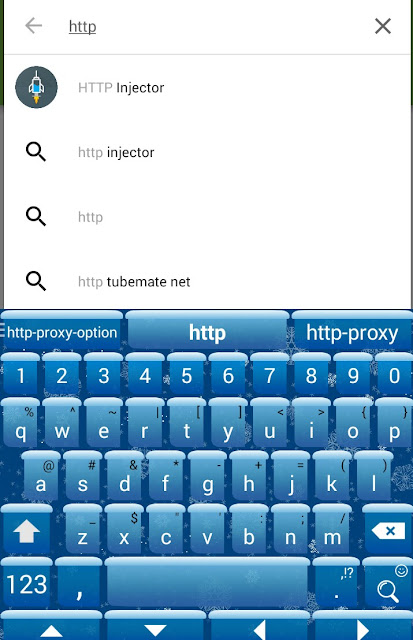
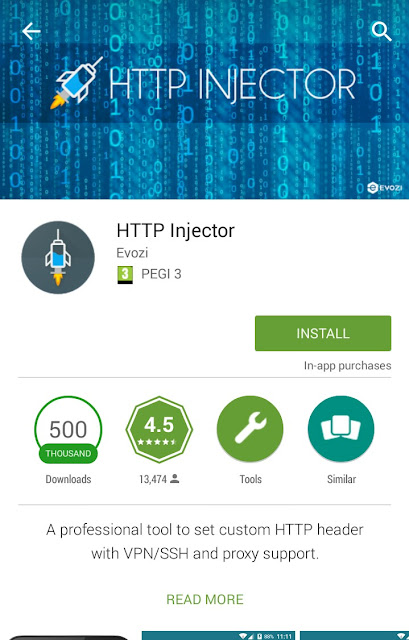
The Application is something like that on Google play store
3. After Download and Installing it, Open the application, Minimise It and goto your access point settings.
4. Create a new access point, name the access point anything. Only make changes to the APN spot, put: "etisalat" - This means that you will leave other spots blank or as they were originally. Save the new access point and then activate it.
5. You will need to download a config. settings, this settings will be what you import on the HTTP Injector App. Click here to download config settings
6. Open back the HTTP Injector application. See the Image below.
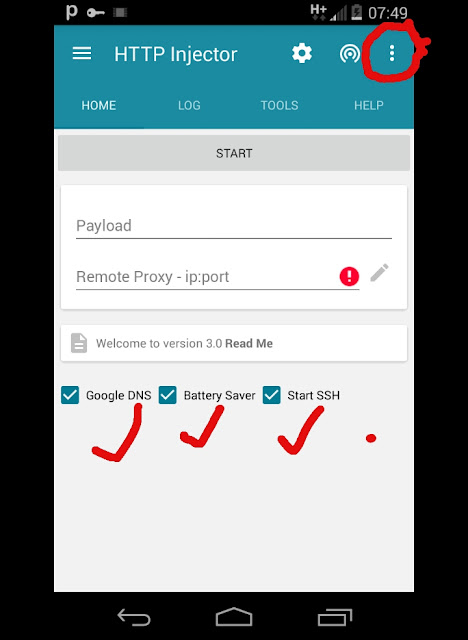
Next, hit where you see the red circle as shown below:

After that,
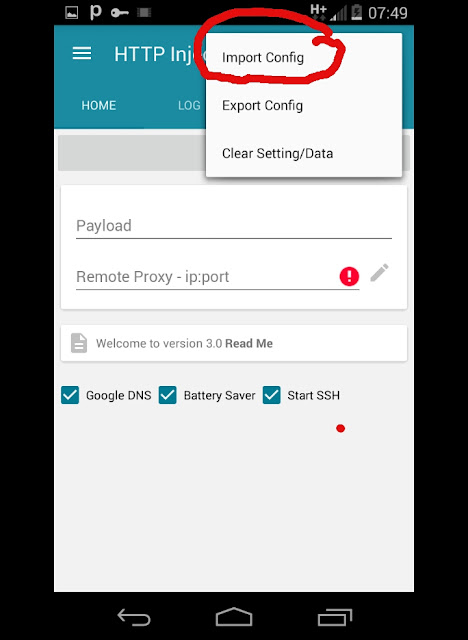
Click on "Import Config". As shown above.
This means that the config. you downloaded before, you will have to locate it in you file manager, so as to import it;
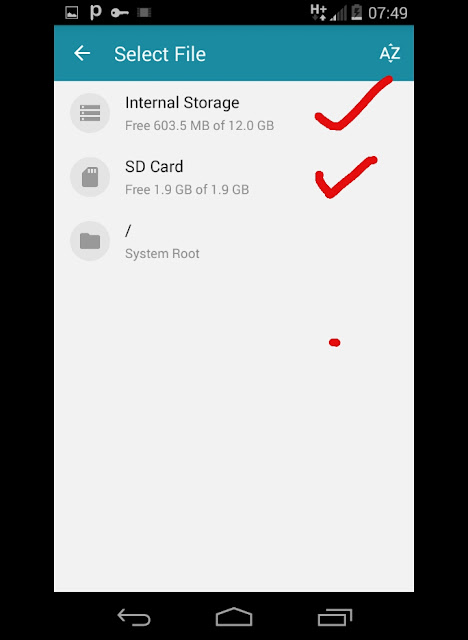
After Locating it, Select the File, To Import it.
When imported, Click on the "Start Button" - as shown below.
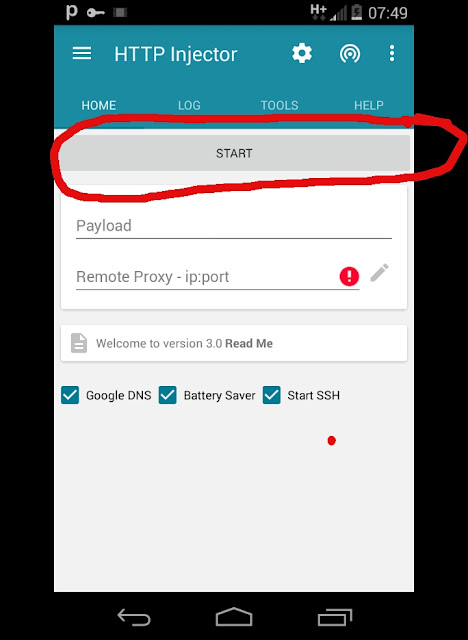
Thats all with the Setup, Within few seconds, the application should connect.
Then you can start browsing free and unlimited.
If you run into any issues, you can add a comment; also, make sure you share this post with others.

.jpg)

it says connecting but don't connect
ReplyDelete